REduce, REuse, REcycle
Part 2:
Making paper from a used brown paper bag to make labels to put on boxes
so that we can start our own "recycling factory".


Kit with materials ready to go!

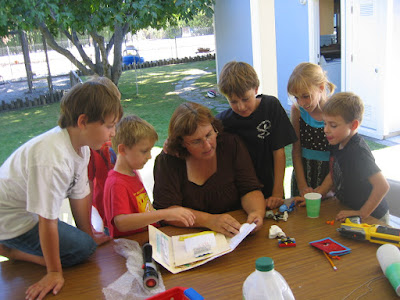
Mark and James tear up a paper bag (1 cup).

Place pieces and 4 cups of warm water in a bowl.

While we waited for 5 minutes for the paper to soak, we watched a
cool video about the recycling process on youtube.

Add the paper and water to the blender (with help from big brother Paul).

Slowly turn blender on and then increase speed.

Place a screen over a mug with a rubber band to secure it. Pour the pulp on to the screen.
Let the water drain into the mug by pushing on the pulp.

Place the pulp on a screen on newspaper or paper towels.
Gently dab pulp with sponge to absorb more moisture.
Put the second screen on top and roll to flatten.
Our homemade paper is sitting on the back porch hoping for some sun to help it dry!
The boys had fun doing this, but... as experiments/projects go, this one was lacking. The method of screening the pulp was a bit cumbersome. And, I don't think our paper is going to be of enough substance to make labels for our recycle baskets.
That is okay! We had a good time, and the boys got an idea of how paper that we recycle gets a new life. We watched this video on youtube and thought it might be a more successful process
(although slightly more complicated).

That is okay! We had a good time, and the boys got an idea of how paper that we recycle gets a new life. We watched this video on youtube and thought it might be a more successful process
(although slightly more complicated).


We made paper a few years ago and had a blast making SLURRY! LOL For screens we took old, cheap 8x10 photo frames and covered them with women's hose! LOL We set them on a thick bath towel with the slurry spread out across the top. After taping the edges of the frame glass, I placed it on top of the homemade paper and gently pushed to get more water out and flatten the slurry. It worked, but we all decided that it was a lot of work to make paper and that we should use it more wisely!
ReplyDeleteJessy
Lori, I love love love handmade paper (although I'm starting to get the feeling that what you did was more of a homemade-brown-kind-of-paper not really meant for writing?). I love those ones which include actual veins/twigs and like dried leaves on them. I often use them to write poetry and I send them to loved ones who can appreciate the feel of the paper and the beautiful rhyme and rhythm of the poems I pen down.
ReplyDeleteI like how you document all your process, though. So precious. Your boys must love seeing this blogpost, and it'd be here for posterity. =)
Ooohhh, that is a cool way to do that. I hadn't seen using the rolling pin before.
ReplyDeleteWhat a fun process! We will have to give this a try ;)
ReplyDelete